Load Balanced Websockets with Spring Cloud Gateway


The ability to have real-time two-way communication between the client and the server is a key feature in most modern web apps.
A simple approach to setting up WebSockets in Spring Boot is covered in Simple WebSockets with Spring Boot, which uses an in-memory message broker. This approach falls short, though, when you scale up and add additional servers. Users connected to different servers would have no way of communicating or getting updates pushed to them for something that's happened on another server. Let's explore how to appropriately scale up WebSockets in our sample app. This will allow any clients the ability to communicate with each other, regardless of the server they are connected to, as well as subscribe to updates that may be happening on a server that they are not connected to.
Project Setup
We need a couple of applications to complete our setup. These include an API Gateway, a WebSocket Server, and a Eureka discovery server so all of our services can find each other.
Note: This project depends on a Eureka server for service discovery. It's possible to modify it to use just DNS names but doing so would require mapping all instances of the WebSocket server to the same DNS name for our API Gateway to properly route requests.
We will need to create multiple applications, so first, create a directory to contain everything related to this post and call it spring-cloud-gateway-websocket. Once that directory is created, cd into it, and run the following commands to generate a sample project.
# Create the API Gateway
curl https://start.spring.io/starter.zip \
    -d dependencies=actuator,cloud-eureka,cloud-gateway \
    -d name=gateway \
    -d artifactId=gateway \
    -d baseDir=gateway | tar -xzvf -

# Create the Eureka Server
curl https://start.spring.io/starter.zip \
    -d dependencies=actuator,cloud-eureka-server \
    -d name=eureka \
    -d artifactId=eureka \
    -d baseDir=eureka | tar -xzvf -

# Create the WebSocket Server
curl https://start.spring.io/starter.zip \
    -d dependencies=websocket,webflux,web,actuator,cloud-eureka \
    -d name=websocket-server \
    -d artifactId=websocket-server \
    -d baseDir=websocket-server | tar -xzvf -
These commands will automatically generate projects from Spring Initializr. We are adding Actuator to all the projects to ensure we can easily test if they are running and healthy, and Eureka will utilize Actuator's health monitoring to check the state of each application instance. By default this monitoring just reports 'UP' as long as the application is running; it is good enough in most circumstances and can be extended to have more fine-grained control over the current application status if needed.
For the 'WebSocket Server' project, we are also adding spring-boot-starter-webflux as a dependency. We require this dependency because the WebSocket Message Broker Relay relies on Reactor Netty under the covers to perform reactive, asynchronous operations for communication with the message broker. Another option is to include artifactiId=spring-boot-starter-reactor-netty with groupId=org.springframework.boot instead, as I have in the demo repository. It is a smaller dependency, but at this time reactor-netty appears to not be available on Spring Initializr, so we can depend on it through webflux.
WebSocket Server
Now that the base projects are generated, we have to do some configuration in the WebSocket Server application.
Application Configuration
The default generated project will contain an application.properties in the resources directory. We can rename this to application.yml as it will be slightly less verbose to work with than the properties style of configuration.
For the app to function as intended in the demo, we need a few configuration keys supplied in our application.yml, like the following snippet.
spring:
  application:
    name: websocket-server
eureka:
  client:
    serviceUrl:
      defaultZone: ${EUREKA_URI:http://localhost:8761/eureka}
    healthcheck:
      enabled: true
  instance:
    prefer-ip-address: true
broker:
  relay:
    host: ${BROKER_HOST:localhost}
We are using the Spring expression language here where we surround the value of a key with ${} to set the value of a key from an environment variable. This tells Spring that it should attempt to find an environment variable or system property (or potentially from other property sources) by the name of the string in the curly braces and use that as the value of the key in the application.yml. The behavior of this can be customized to supply a default when no value is found in the environment, which is why we have a : in the configuration value. Any value to the right of the colon is used as the default for the configuration key if no environment variable that matches the name on the left is found. This pattern is useful for defining a default value when you are running an application on your localhost and is a useful mechanism for supplying the production configuration values by environment variables.
In the configuration above, we have an application name defined. This is important since the Eureka integration will use the Spring application name by default to identify instance groups of the application (i.e. the server application, instances 1 and 2 vs the gateway application) and it will be important in allowing our gateway to route requests later in this post. Additionally, we have a configuration value for the Eureka service URL's default zone. This value is to tell the discovery client where to connect when looking for the service discovery server. In this case, if we want to run the whole application locally, we can have a copy of our Eureka server running with its default configuration (port 8761), and start up our WebSocket Server which will try to connect Eureka at http://localhost:8761/eureka. Having this and the Broker relay host defined as environment variables will be helpful when we configure everything to run with docker-compose.
Since we are using Eureka to perform service discovery in our application cluster, we need to enable it for our applications, otherwise, the auto-configuration provided by Spring Boot will not run.
It is sufficient to annotate the main application class or any configuration class with @EnableDiscoveryClient. Once you do so, Spring will automatically instantiate all configurations related to the Service Discovery Client that are required for this demo.
Create the Spring WebSocket Configuration
We need to tell Spring how to forward messages and where our WebSocket endpoint should live. Create a configuration class to enable broker-backed messaging and to configure WebSockets.
@Configuration
@EnableWebSocketMessageBroker
public class WebSocketConfig implements WebSocketMessageBrokerConfigurer {

    @Value("${broker.relay.host}")
    private String brokerRelayHost;

    @Override
    public void configureMessageBroker(MessageBrokerRegistry registry) {
        registry.enableStompBrokerRelay("/queue", "/topic")
            .setRelayHost(brokerRelayHost);
        registry.setApplicationDestinationPrefixes("/app");
    }

    @Override
    public void registerStompEndpoints(StompEndpointRegistry registry) {
        registry.addEndpoint("/websocket")
            .setAllowedOrigins("*");
        registry.addEndpoint("/sockjs")
            .setAllowedOrigins("*")
            .withSockJS();
    }
}
This configuration class has a couple of important bits that are worth paying attention to. First, this class uses the @Configuration stereotype to identify it to Spring as a Component, which is a Configuration type. Also, it has the @EnableWebSocketMessageBroker annotation. This annotation configures Spring to "enable broker-backed messaging over WebSocket using a higher-level messaging sub-protocol," as noted in the annotation's javadoc. In more simple terms, this allows Spring to talk to a message broker via a protocol like STOMP (Simple Text Oriented Message Protocol) or AMQP (Advanced Message Queuing Protocol), etc., rather than raw TCP WebSocket protocol which will enable more features of the message broker than the low-level protocol would.
The configuration class also extends a WebSocketMessageBrokerConfigurer, an interface provided by Spring for us to modify the configuration provided by the @EnableWebSocketMessageBroker annotation. In the example above, we've done two things: first, we've configured a Message Broker via the MessageBrokerRegistry, and second, we've configured a STOMP Endpoint via the StompEndpointRegistry. For the MessageBrokerRegistry, we've told Spring to relay all messages received from the WebSocket protocol to our brokerRelayHost for any destinations (or endpoints for REST or MVC style language) that are prefixed with /topic or /queue. These two prefixes are chosen to be those supported by the STOMP message broker relay (in this case I will choose RabbitMQ to act as the message broker), and all messages destined for those prefixes will be forwarded over the message broker to (potentially) be re-broadcast to all other instances of our server app. As the source for enableStompBrokerRelay interface method notes:
Enable a STOMP broker relay and configure the destination prefixes supported by the message broker. Check the STOMP documentation of the message broker for supported destinations.
Also, depending on the message broker you choose, you might wish to configure a different path separator. Some message brokers may require you to use . as a path separator to fully utilize the broker's path matching abilities. To use a period as a path separator, the registry can be configured with a new ant matcher for the path like so: registry.setPathMatcher(new AntPathMatcher(".")). A good example of this would be RabbitMQ's Topic Exchange tutorial which gives a good overview of using wildcards or path substitutions for a fan-out pattern.
What about the case that we want to use the same RabbitMQ instance as the message broker for multiple applications? The config above can remain mostly the same, but Spring's integration provides a method to configure application-specific prefixes, setApplicationDestinationPrefixes. This method will configure the broker integration to filter messages destined for annotated methods. So, as an example, a message destined for /app/my/message/endpoint would target a method annotated with @MessageMapping("/my/message/endpoint"). Spring will automatically strip the prefix as defined in the configuration so the application itself does not need context of any prefixes used for routing. On the other hand, any message destined for /topic/some/notification/topic or /queue/some/work/queue will be directed to the message broker.
We still need to tell Spring where our WebSocket should live—rather, at which endpoint it should be available. To do so, we use the StompEndpointRegistry to register any endpoints we want to expose and the configurations for those endpoints. For this demo, allowed origins are set to * to allow any origin to connect (in case you don't host the client HTML page from the same server), and also to configure the SockJS fallback option. The SockJS fallback allows the application to utilize plain HTTP for WebSocket-like communication as an alternative when the WebSocket protocol is not available or cannot be established between client and server.
This wraps up all the configuration required and mirrors the previous WebSocket post very closely aside from configuring a 'relay' rather than a 'Simple WebSocket Broker.'
Make the Message Payload
Like in the previous post, we need a class to represent the data passed back and forth between the client and the server. This class just needs to be plain old Java object, but with the caveat that it needs a default constructor for Jackson to properly deserialize JSON into the object.
public class Message {
    private String message;

    public Message() {
        // Required for Jackson
    }

    public Message(String message) {
        this.message = message;
    }

    public String getMessage() {
        return message;
    }
}
Create the Message Controller
Next up, we need a controller to handle the "web" facing part of the application and to map incoming WebSocket messages onto a method. The message controller is more or less the same as a "rest" controller or MVC controller, but rather than defining HTTP verb mappings, we specify "MessageMappings."
@Controller
public class WebsocketController {
    private static final Logger LOGGER = LoggerFactory.getLogger(WebsocketController.class);

    @Value("${server.port}")
    private String port;

    @MessageMapping("/incoming")
    @SendTo("/topic/outgoing")
    public String incoming(Message message) {
        LOGGER.info(String.format("received message: %s", message));
        return String.format("Application on port %s responded to your message: \"%s\"", port, message.getMessage());
    }
}
The controller has two special mappings if you're familiar with HTTP based mappings. First, it has a @MessageMapping which instructs Spring to accept any messages destined for /incoming (with the prefix configured previously!). It also uses the message body as the input to the annotated method. The other special annotation is the @SendTo mapping. This mapping is useful for redirecting the output of our method to a specific destination. In this case, the destination is defined as /topic/outgoing, which will be redirected to the message broker as it has a prefix that was configured for the relay above. Without the SendTo annotation, the output of the MessageMapping annotation would automatically direct the return of our mapped method back to the channel it received the message on. Depending on the use case, this isn't always desirable. This could be further customized with the @SendToUser annotation, however, which would extract a user's username from the headers of the input message.
For demonstration, we want to add one more method to our controller. We want to make sure that we can generate a message on multiple instances of our WebSocket Server (hence the "load balanced" part). To ensure that we can receive messages regardless of the server instance that generated them, let's create a timed method in our controller that will automatically publish messages to the same topic that our incoming message handler publishes to.
    @Scheduled(fixedRate = 15000L)
    public void timed() {
        try {
            // simulate randomness in our timed responses to the client
            Thread.sleep(RANDOM.nextInt(10) * 1000);
            LOGGER.info("sending timed message");
            simpMessagingTemplate.convertAndSend(
                "/topic/outgoing",
                String.format("Application on port %s pushed a message!", port)
            );
        } catch (InterruptedException exception) {
            LOGGER.error(String.format("Thread sleep interrupted. Nested exception %s", exception.getMessage()));
        }
    }
Also, add a private variable and new constructor to support the 'simpMessagingTemplate' used in the timed method.
    ...

    private final SimpMessagingTemplate simpMessagingTemplate;

    ...


    @Autowired
    public WebsocketController(SimpMessagingTemplate simpMessagingTemplate) {
        this.simpMessagingTemplate = simpMessagingTemplate;
    }

    ...
Since this method is annotated with @Scheduled, do not forget to annotate a configuration class or the main application class with @EnableScheduling, otherwise the scheduled method will not fire.
This finishes off the configuration needed for the WebSocket Server to ensure that we can send and receive WebSocket messages!
Dockerfile
We are utilizing a multi-stage build so we only require Docker installed on our machine to build and test the application.
FROM maven:3-jdk-8-alpine AS build
WORKDIR /opt/src
COPY pom.xml .
RUN mvn dependency:go-offline
COPY src src
RUN mvn package -Dmaven.test.skip=true spring-boot:repackage

FROM openjdk:8-jre-alpine
COPY --from=build /opt/src/target/websocket-server-0.0.1-SNAPSHOT.jar /opt/app.jar
ENTRYPOINT ["java","-jar","/opt/app.jar"]
The idea here is to cache as much as possible so that in the event of source code changes (COPY src src happens after mvn dependency:go-offine), Docker can cache all the dependencies from Maven so we don't need to download them multiple times.
Then since we have the source files, we can run Maven to package and spring-boot:repackage the application into a fat jar to run later.
The second FROM step is the second dockerfile stage, so we create a new container that contains just that base FROM along with the jar file and an entrypoint which defines what command(s) to run when the docker container is started.
Gateway
Next, the gateway needs to be configured to route requests to the appropriate server instances. Without this, the application will not have reachable endpoints when it is run in clustered mode.
Application Configuration
The default generated project will contain an application.properties in the resources directory. We can rename this to application.yml as it will be slightly less verbose to work with than the properties style of configuration.
For the app to function as intended in the demo, we need a few configuration keys supplied in our application.yml.
spring:
  application:
    name: gateway
eureka:
  client:
    serviceUrl:
      defaultZone: ${EUREKA_URI:http://localhost:8761/eureka}
    healthcheck:
      enabled: true
  instance:
    prefer-ip-address: true
Here we are configuring Eureka the same as in the WebSocket Server application above. The only difference is that we do not have to define a value for the "broker host" and we've given this application a different name: gateway. It's not important at this point for Gateway to have a name defined in the configuration since we are not relying on Eureka to route requests to our gateway application. We can simply reach it by http://localhost:8080 since this is the default interface and port Spring will listen on.
We are relying on Eureka's discovery client to help the gateway know where to find the service(s) it will be routing requests to, so we need to annotate the main application class or any configuration class with @EnableDiscoveryClient. Discovery Client tracks the IP and the port of every application in our cluster, which is how the gateway knows that http://weboscket-server is actually http://docker-ip-address:application-port. We need to configure the gateway to fetch this information from Eureka since the route configuration we are using depends on the mapping for client-side load balancing and forwarding traffic to the correct IP within the Docker network.
Configure Routes in the Gateway
Setting up the gateway to route traffic to our WebSocket Server instances is pretty simple. Spring Cloud Gateway provides an object to create the route mapping, RouteLocatorBuilder, which we will use to customize all back-end routing in our application.
@Configuration
public class RouteLocatorConfiguration {
    @Bean
    public RouteLocator myRoutes(RouteLocatorBuilder builder) {
        return builder.routes()
            .route(predicateSpec -> predicateSpec
                .path("/**")
                .uri("lb://websocket-server")
            )
            .build();
    }
}
The RouteLocatorBuilder allows us to define a lambda function as a provider to define how to match incoming requests to routes. In this demo, we are using just the "path" matcher, which takes in an AntMatcher style string pattern to determine if the incoming request matches or not; anything prefixed with / will match, and is then routed to the URI provided with the PredicateSpec.
In the URI defined above, we don't give Gateway the IP address or the port of the application for routing. As noted earlier, this is so that Gateway can use the Service Discovery Client to infer which application we are trying to route to using the first part of the URI path (the hostname of the service). Each Service Discovery Client instance will connect to the Eureka server to report which port and IP address they are running on. This is very helpful in the case we don't know what IP address our service will be assigned when deploying to a container orchestration platform (like Amazon Elastic Container Service or Kubernetes, etc.) or when we are running our app locally as a cluster with Docker Compose.
The URI also contains a non-standard protocol prefix lb. The lb prefix is supplied by Service Discovery and it instructs the route locator to lookup the real route(s) for a given service by Service Discovery name (the spring.application.name configured in the application.yml). This prefix is also an instruction to perform client-side load balancing, so for all known IP addresses of service websocket-server, the Discovery Client should return them per some load-balancing algorithm like round-robin.
At this point, our application is all configured and ready to run except for a client to connect to it and a message broker to handle the incoming WebSocket connections and message routing.
Dockerfile
Just like the dockerfile for the WebSocket Server, we are utilizing a multi-stage build so we only require Docker installed on our machine to build and test the application.
FROM maven:3-jdk-8-alpine AS build
WORKDIR /opt/src
COPY pom.xml .
RUN mvn dependency:go-offline
COPY src src
RUN mvn package -Dmaven.test.skip=true spring-boot:repackage

FROM openjdk:8-jre-alpine
COPY --from=build /opt/src/target/gateway-0.0.1-SNAPSHOT.jar /opt/app.jar
ENTRYPOINT ["java","-jar","/opt/app.jar"]
Eureka
The base project generated for Eureka is sufficient to get us up and running, but the plan for later is to run with docker-compose, so we need to create a dockerfile for this project as well.
Dockerfile
The dockerfile for the Eureka server is exactly the same as the other dockerfiles, aside from the COPY command which specifies a different jar to copy into the final image.
FROM maven:3-jdk-8-alpine AS build
WORKDIR /opt/src
COPY pom.xml .
RUN mvn dependency:go-offline
COPY src src
RUN mvn package -Dmaven.test.skip=true spring-boot:repackage

FROM openjdk:8-jre-alpine
COPY --from=build /opt/src/target/eureka-0.0.1-SNAPSHOT.jar /opt/app.jar
ENTRYPOINT ["java","-jar","/opt/app.jar"]
Client
We have all the code we need set up for our API to work, but we still need a UI to connect up to the app to test it. This could be anything from a mobile app or a desktop application to another server application or a simple HTML page. For demonstration, an HTML page is the easiest route since you likely already have a web browser (otherwise how are you browsing this post? [...seriously, I'd like to know...]). It's very easy to get a basic page up and running with a few utilities pulled from a CDN in script tags.
This section is nearly identical to the Create a Client section in my Simple WebSockets with Spring Boot post.
Create the WebSocket Client
To keep things simple, we can just create a basic static HTML page with jQuery to provide some user interaction.
To start, create an HTML page. In the header, add jQuery and StompJS from CDN. You can also add SockJS if you'd like to experiment with backward compatibility, but it isn't a requirement.
    <script src="https://cdnjs.cloudflare.com/ajax/libs/jquery/3.3.1/jquery.js"></script>
    <script src="https://cdn.jsdelivr.net/npm/@stomp/[email protected]/bundles/stomp.umd.js"></script>
    <script src="https://cdn.jsdelivr.net/npm/sockjs-client@1/dist/sockjs.min.js"></script>
To style things a little more nicely, I've also added Bootstrap, but that is just to make it look a little prettier than basic HTML layout and is not required.
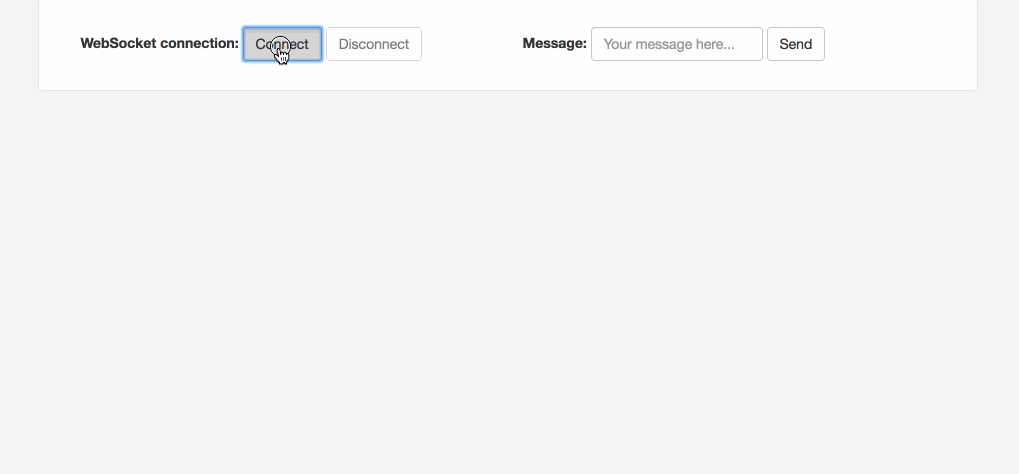
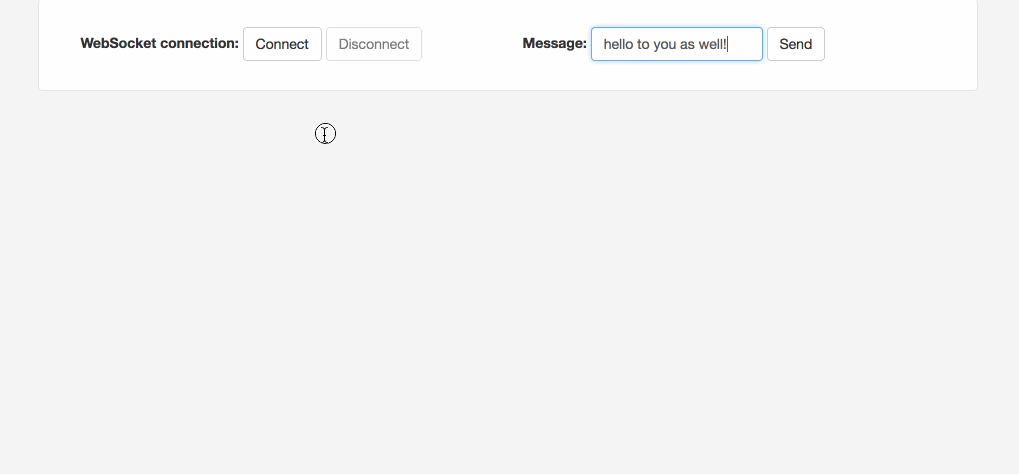
Now that we have the required libraries included, we can write some HTML for controls to connect and disconnect, a form to send messages, and a table to hold the responses from our server.
<div class="container" id="main-content">
  <div class="row">
    <div class="col-md-6">
      <form class="form-inline">
        <div class="form-group">
          <label for="connect">WebSocket connection:</label>
          <button class="btn btn-default" id="connect" type="submit">Connect</button>
          <button class="btn btn-default" disabled="disabled" id="disconnect" type="submit">Disconnect
          </button>
        </div>
      </form>
    </div>
    <div class="col-md-6">
      <form class="form-inline">
        <div class="form-group">
          <label for="message">Message:</label>
          <input class="form-control" id="message" placeholder="Your message here..." type="text">
        </div>
        <button class="btn btn-default" id="send" type="submit">Send</button>
      </form>
    </div>
  </div>
  <div class="row">
    <div class="col-md-12">
      <table class="table table-striped" id="responses">
        <thead>
        <tr>
          <th>Messages</th>
        </tr>
        </thead>
        <tbody id="messages">
        </tbody>
      </table>
    </div>
  </div>
</div>
Now that we have the skeleton of the HTML out of the way, we can write some functions to handle connecting, disconnecting, sending messages, and receiving messages.
    var stompClient = null;

    function connect() {
      stompClient = new window.StompJs.Client({
        webSocketFactory: function () {
          return new WebSocket("ws://localhost:8080/websocket");
        }
      });
      stompClient.onConnect = function (frame) {
        frameHandler(frame)
      };
      stompClient.onWebsocketClose = function () {
        onSocketClose();
      };

      stompClient.activate();
    }
For the connection function, we will create a global variable to hold our Stomp Client and use the StompJS library to create a new client instance. We've given our client a configuration object to use an anonymous function for the WebSocket factory so we can use the browser's built-in WebSocket object, and connect to the correct URL. If we wanted to use SockJS instead of the browser's built-in WebSocket implementation, we can just replace the return of that anonymous function with new window.SockJS("http://localhost:8080/sockjs");.
Note: we use thewindowkeyword since we've registered the SockJS library as a global library in the browser window. In a modern web app with Angular, React, Vue, etc., you would probably just use an import local to the component using it and it would then be accessible with just the new command likenew SockJS(...).
We have also assigned some functions to the onConnect and the onWebsocketClose hooks.
function onSocketClose() {
    if (stompClient !== null) {
        stompClient.deactivate();
    }
    setConnected(false);
    console.log("Socket was closed. Setting connected to false!")
}
The onSocketClose function is helpful to properly update our view so that when we lose or close the connection to the socket, the UI updates to enable or disable specific components. Here we can also see the setConnected function which is responsible for handling the display changes when our socket connects or disconnects:
function setConnected(connected) {
    $("#connect").prop("disabled", connected);
    $("#connectSockJS").prop("disabled", connected);
    $("#disconnect").prop("disabled", !connected);
    if (connected) {
        $("#responses").show();
    } else {
        $("#responses").hide();
    }
    $("#messages").html("");
}
Now we need to write a method to handle the messages that are sent from the server.
function frameHandler(frame) {
    setConnected(true);
    console.log('Connected: ' + frame);
    stompClient.subscribe('/topic/outgoing', function (message) {
        showMessage(message.body);
    });
}
This frameHandler function takes in an object called frame. Each frame may represent a different state of the WebSocket or messages pushed from the server. Mozilla has great documentation on WebSockets that is worth a glance. What is important to us is that when we receive a frame the socket will be connected and we want to subscribe to a topic from our server. This topic will be where the server writes messages destined for the client. We also have a function callback that is responsible for handling each message sent from the server. The message here is just a string message (since we're using STOMP as our protocol over WebSocket). The implementation below will prepend the newest message to the top of our messages table we created earlier.
    function showMessage(message) {
      $("#responses").prepend("<tr><td>" + message + "</td></tr>");
    }
Now we also need the ability to send a message to the server.
    function sendMessage() {
      stompClient.publish({
        destination: "/app/incoming",
        body: JSON.stringify({'message': $("#message").val()})
      });
    }
This function instructs the stopClient to publish a message on the topic /app/incoming with a body containing our inputs from the HTML form. Once the stop client publishes to this topic, the server will receive the message, route it to our @MessageMapping with the configured /incoming destination.
We should also have a manual disconnect method to close out the connection to the WebSocket, just for demonstration purposes. It simply deactivates the StompClient (and all subscriptions) if the client is not null. Since this is the same functionality as the onSocketClose function, we can just proxy that call here.
function disconnect() {
    onSocketClose();
}
The last bit we need to do to get a functional client is to set up jQuery listeners on our buttons and configure a document ready function.
$(function () {
    $("form").on('submit', function (e) {
        e.preventDefault();
    });
    $("#connect").click(function () {
        connect();
    });
    $("#connectSockJS").click(function () {
        connectSockJs();
    });
    $("#disconnect").click(function () {
        disconnect();
    });
    $("#send").click(function () {
        sendMessage();
    });
    $("document").ready(function () {
        disconnect();
    });
});
This file should be placed in the root of the project as example.html, and we can open it directly with a browser. The other option is to place our HTML file in the application's resources directory, named example.html (websocket-server/src/main/resources/static/example.html). Then we will be able to access http://localhost:8080/example.html when we start the application with docker-compose. Without docker-compose (more specifically the Gateway), it will be a little more difficult since the project is configured to have the WebSocket Server instance(s) listen on random ports; it'll be important to check the logs to see what port the server is running on, otherwise we may not be able to access it unless we also have the Gateway and Eureka applications running.
For demonstration, once the application is up and running with Gateway and Eureka, I've included a copy of the HTML file we created here in a static resources directory in the WebSocket Server application. Since we have the Gateway configured to forward ALL requests to the WebSocket Server application, this should allow us to host the HTML from that app and access it via http://localhost:8080/example.html.
Message Broker
The final important piece of the application is a Message Broker. This is what will be responsible for managing connected application instances and clients and determining where to route messages. There are many message brokers to choose from, but the two that will be easiest to drop in for our application are RabbitMQ and ActiveMQ as they both support the STOMP protocol and have nearly identical out of the box configurations.
For this post, I've chosen to use RabbitMQ since it's very popular and has good performance outside of highly specialized applications that require a very large number of message producers. To get this set up, we just need to create a directory in our project called rabbitmq, and we can create a Dockerfile in that directory like the following:
FROM rabbitmq:3.7-management
RUN rabbitmq-plugins enable --offline rabbitmq_mqtt rabbitmq_federation_management rabbitmq_stomp
This does some configuration on startup which configures the MQTT, federation management, and STOMP plug-ins for RabbitMQ. Only the STOMP plug-in is required for this demo, but the others may be useful if you want to reuse this for other projects.
Run the Application
Now everything is set up and ready to go. We can run RabbitMQ by building the docker image and running it in a new container, start up the Eureka server, Gateway, and WebSocket Server. It gets very tedious to keep starting up these dependencies, so instead, we can create a docker-compose.yml which will allow us to automatically build all the applications, create containers, network them together, and start up the applications!
(Docker) Compose the App Cluster
To use docker-compose, just create a docker-compose.yml in the root of the project directory with the following contents:
version: '3'

services:
  rabbitmq:
    build: rabbitmq
    labels:
      kompose.service.type: nodeport
    ports:
      - '15672:15672'
    volumes:
      - 'rabbitmq_data:/bitnami'

  eureka:
    build: ./eureka
    ports:
      - '8761:8761'

  gateway:
    build: ./gateway
    ports:
      - '8080:8080'
    depends_on:
      - eureka
    environment:
      - EUREKA_URI=http://eureka:8761/eureka

  websocket-server-1:
    build: ./websocket-server
    depends_on:
      - eureka
      - rabbitmq
    environment:
      - EUREKA_URI=http://eureka:8761/eureka
      - BROKER_RELAY_HOST=rabbitmq

  websocket-server-2:
    build: ./websocket-server
    depends_on:
      - eureka
      - rabbitmq
    environment:
      - EUREKA_URI=http://eureka:8761/eureka
      - BROKER_RELAY_HOST=rabbitmq

volumes:
  rabbitmq_data:
    driver: local
We've set up all of our services here and configured docker-compose to build the Dockerfiles from each of the projects. When the containers start up, we've also supplied some environment variables to tell the applications where to find Eureka as well as the hostname for our Broker Relay Host.
Now, run the application with docker-compose build; docker-compose up from the root of the project directory and all the servers will build and start up.
Verify that the application has started up by visiting http://localhost:8080/actuator/health to check if the Gateway is healthy. Also, verify that the Gateway and WebSocket Server instances have all connected to Eureka by visiting the Eureka dashboard at http://localhost:8761. If all is well, then you should be able to open http://localhost:8080/example.html, hit the connect button, and start receiving timed messages from both instances of the WebSocket Server. Depending on which instance you connect to, you should also be able to send messages and receive a response from one of the servers. You can try opening the page in a new tab or different browser and hopefully be routed to the second instance when you connect to the WebSocket endpoint and verify that you can see messages sent from all other clients connected.
Here are a couple gifs demonstrating what we should expect to see after the project is configured and running.
That covers all of the required setup and configuration to get a basic load-balanced WebSocket connection up and running. More advanced setups would include Spring Security to authenticate the initial WebSocket connection over HTTP when negotiating the protocol upgrade, as well as more advanced routing of messages along with tracking connected users and authorizing specific requests over the WebSocket protocol. That might be the topic of a future post...
Get the Code
If you want to just get the demo application, see my repository on GitHub (Spring Cloud Gateway WebSocket) and look for the README.md for info on running.